One of the benefits of playing with electronics and Making is that with time, you can start fixing gadgets around the house. I’m not talking about home appliances – these could really harm you if you don’t know exactly what you’re doing – but there are plenty of other opportunities. Take, for instance, this Remote Controlled Beetle toy:
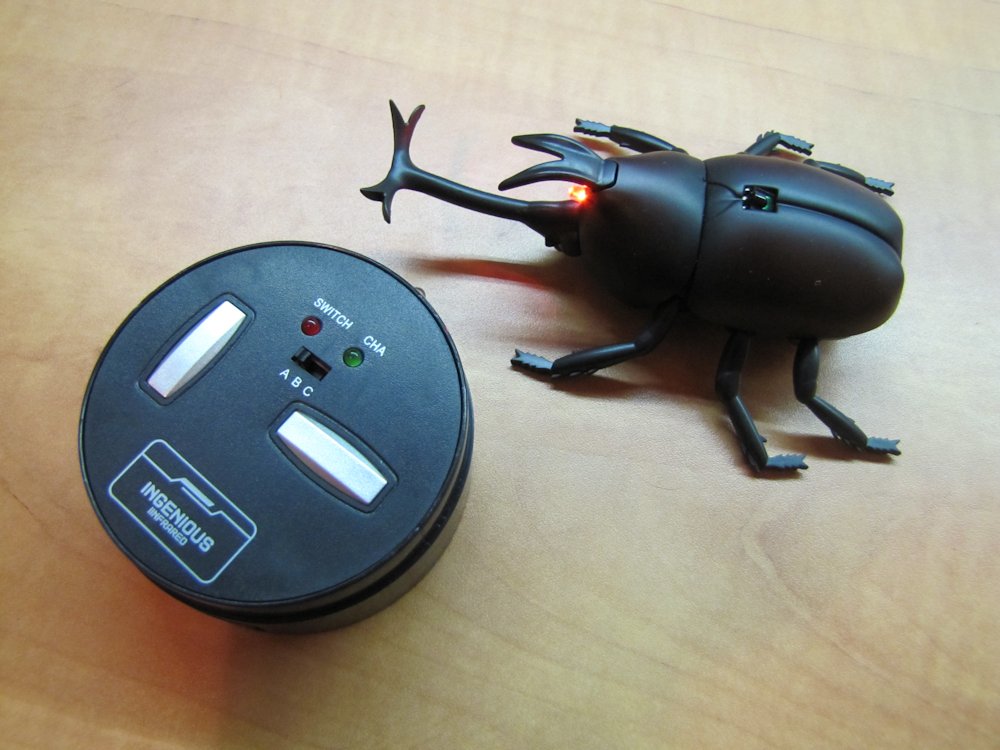
This wan’t my bug actually. I got it second-hand, already in a bad shape: although its front light worked, and the internal battery was fully charged, it didn’t respond to the remote control, no matter what. Before explaining what I did, let’s talk a bit about this kind of remote.
The IR Remote
Infra-Red remote controls send commands and information using – you guessed it! – infrared light. They have one or two IR LEDs at the front, and when you press a button, the chip inside causes the LEDs to turn on and off very quickly with accurate timing. The exact pattern of this blinking over time represents the data. Due to technical reasons, which I will discuss in depth in the future, this communication method tends to be rather slow, in microcontroller terms. So slow that we if we could see the emitted light… hang on, we CAN see it!
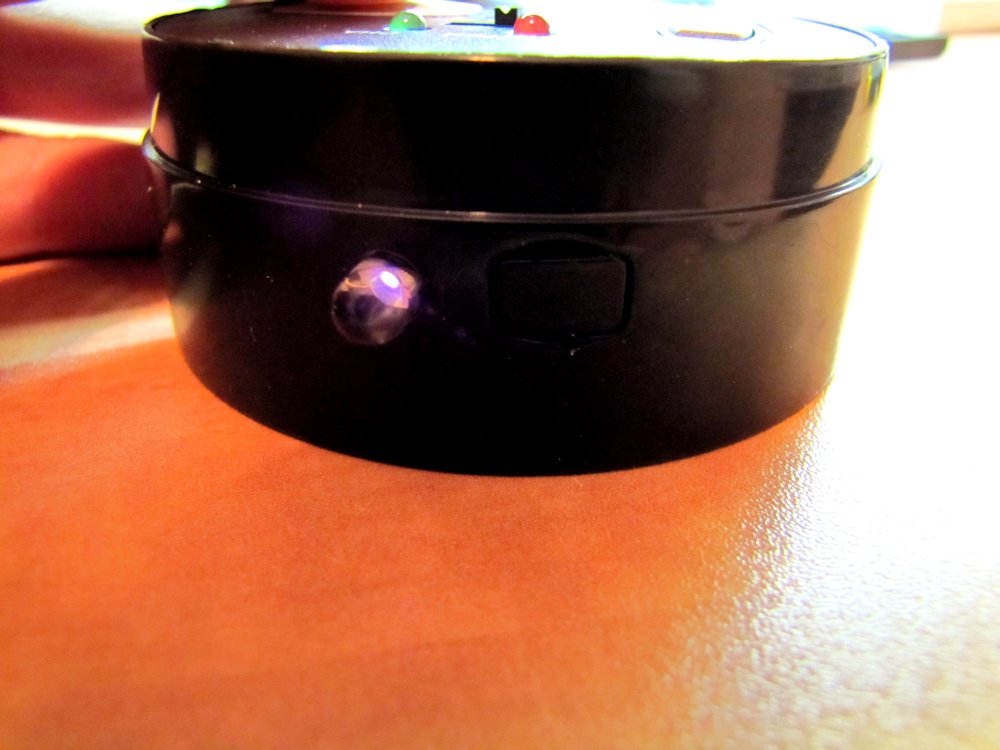
As it turns out, the optical sensors of digital cameras do react to this light, and if you direct such cameras at the remote’s LEDs, you can actually see the light on the screen – quite paradoxically, I must say, as white-purple.
Debugging the Bug in the Bug
There could be many reasons why the beetle didn’t move. A torn wire to the motor; a burnt electrical component; a mechanical disturbance. With no further information, the best strategy is to begin the search where it’s easiest. So I took out my digital camera, put it in front of the remote and clicked a button.
Nothing.
Well, that was quick! There was an indicator LED on the remote that did light up when I pressed things, so I knew it wasn’t a problem with the remote’s power supply or contacts. The cause was somewhere between the microcontroller and the tip of the IR LED.
I opened up the remote and inspected the circuit. Everything looked clean and in place:
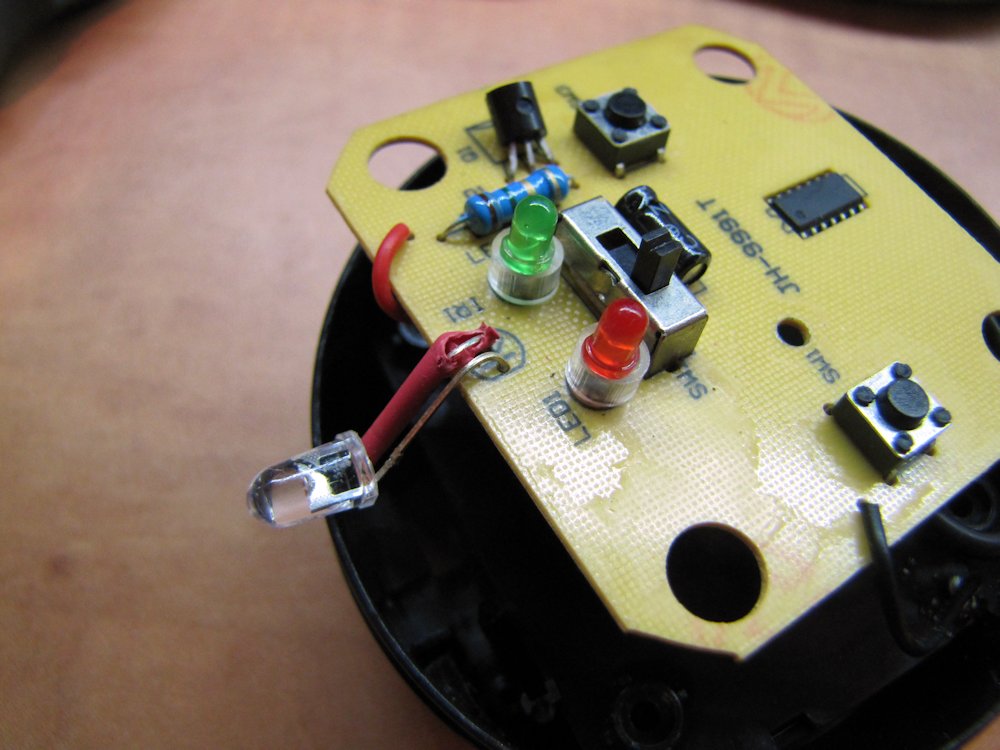
The tear in the red sleeve on the LED is my doing: I exposed some metal for the next test, in which I took a regular red LED from my electronics junk box (everybody should have one!) and had its legs touch those of the original. When I clicked a button, I saw it flash like crazy. Mystery solved: the IR LED was dead.
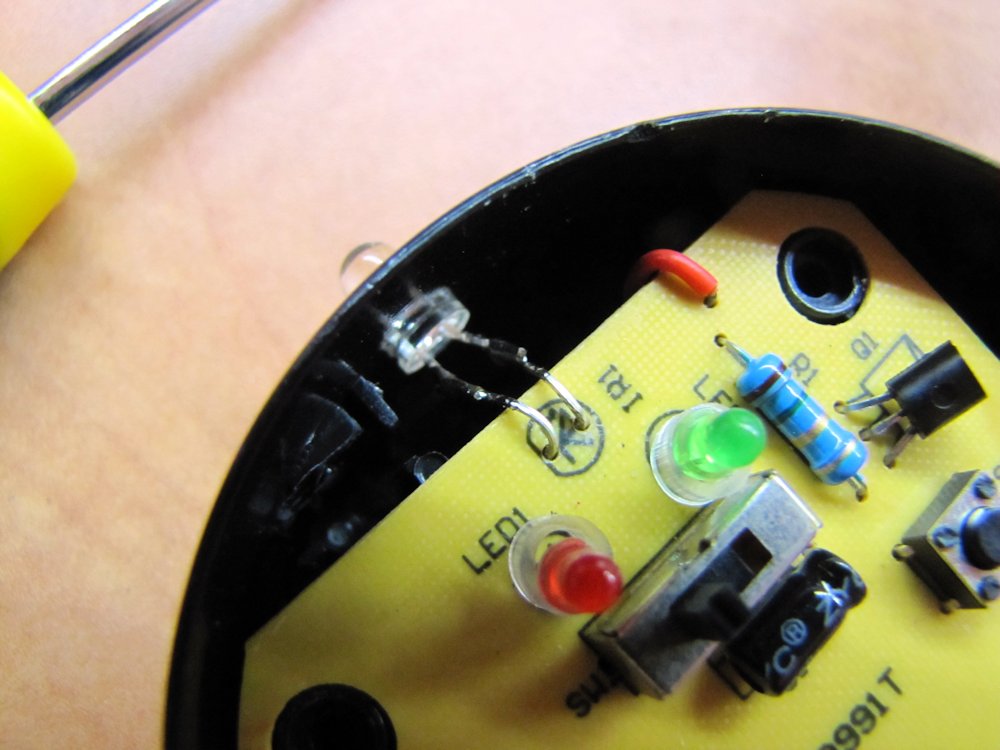
And soon enough, so was my poor red LED. That was an overlook on my part: IR LEDs, especially in remotes that are supposed to send data relatively far, take more electrical current that visible-light LEDs. I should have used a resistor to limit current to the test LED; being unprotected, it simply burnt out.
In fact, it might have been a good idea to put a resistor in there anyway – perhaps over-current is what killed the IR LED to begin with. But access and space limitations in the plastic package were against me, so I just cut out the burnt LED, took an old IR LED I tore once from an orphan TV remote, and soldered it instead. We’ll cover soldering in this blog too, don’t worry.
And that was it, actually. The beetle works again, at a fraction of what it would have cost to go and buy a new one. Furthermore, with such simple methods one can sometimes hack gadgets and make them more interesting and/or useful.
Here’s what the working IR LED looks like to the digital camera: