
After playing with the Arduino for a certain period, you may feel an urge to move forward to stand-alone microcontrollers. The official way to program AVR MCUs is with the Atmel Studio IDE and an Atmel programmer/debugger, such as Atmel-ICE. But Atmel Studio is only for Windows, and the programmers are pretty expensive. Here’s an alternative.
In a surprisingly short time, I was able to come up with a solution for Linux that is not too demanding, especially if you’re a Linux noob like me. It’s even practical for single-board computers, such as Raspberry Pi, my Beaglebone Black and similar boards. that serve as desktops with proper Linux distributions. Here we go:
What You’ll Need
1. The Code::Blocks IDE. It’s free, open source, cross-platform, convenient, doesn’t strain the CPU too much – and during installation, you can select the option to compile code for the AVR microcontroller family (using GNU AVR GCC compiler).
2. AVRDude. This is a command-line program that may seem very scary at first, but you don’t have to understand much of it for this humble beginning, just follow the rules.
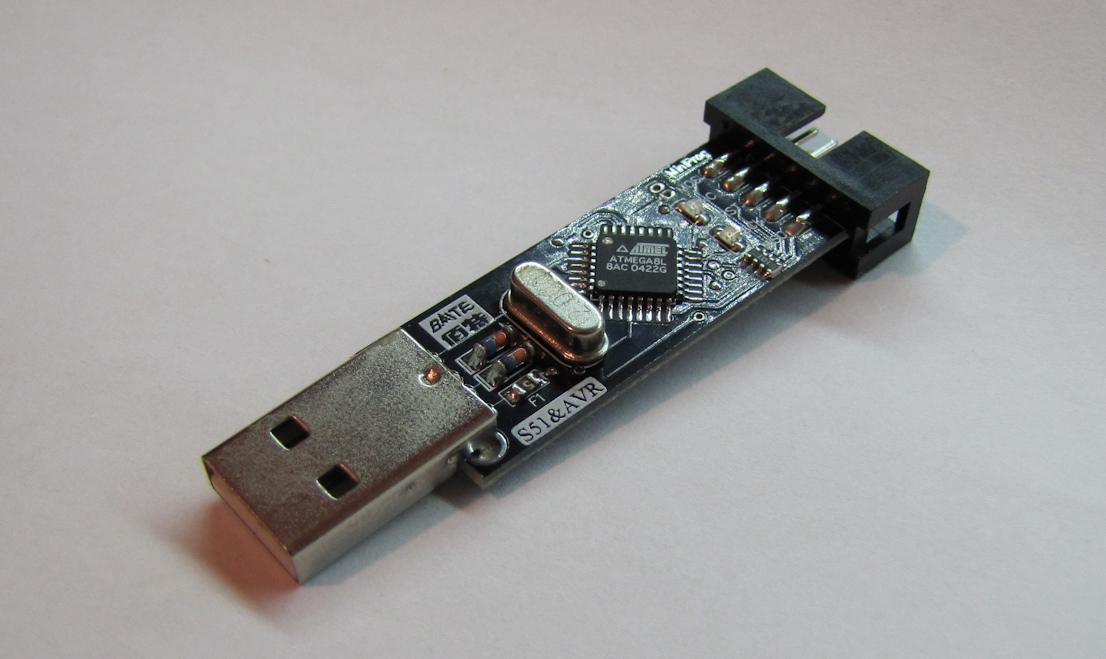
3. A cheap USB ISP programmer for AVRs (also called USBasp, like the one in the picture above). These unofficial programmers will do the trick for most hobbyist purposes, and they are less than $3 apiece on eBay. I got this particular model*, but I guess others will work just fine. You may also want a 10-pin to 6-pin adapter, but it’s not mandatory.
4. Some breadboarding wires, and a breadboard or some other way to connect the programmer’s connector to the MCU pins.
5. And an AVR microcontroller, obviously.
* If you happen to buy something at buyincoins.com, during checkout, look for the “Have a recommender?” box. If you write info@idogendel.com there, you’ll get a small discount for the first purchase and I’ll get a small commission. Just sayin’ 🙂
Coding And Compiling
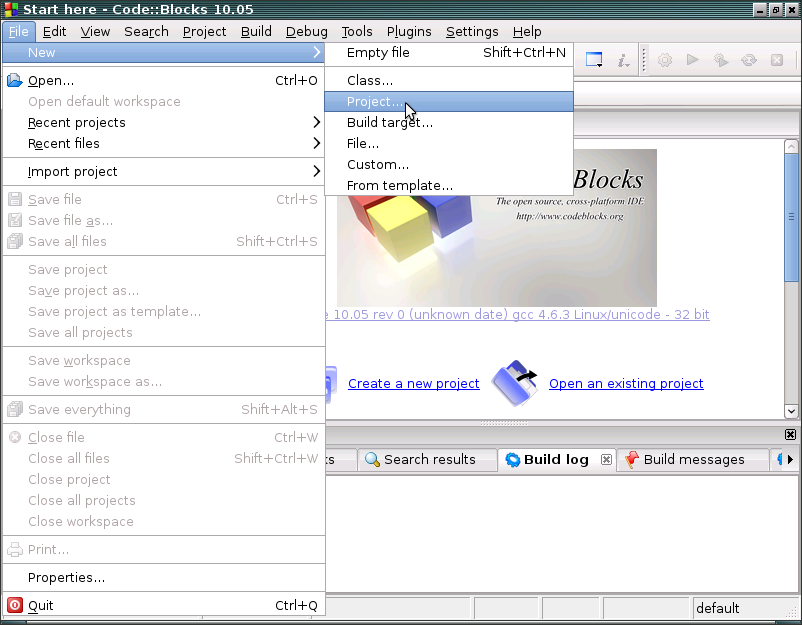
All the following images are screenshots from my Beaglebone Black. First, Let’s fire up Code::Blocks and select File->New->Project… from the menu.
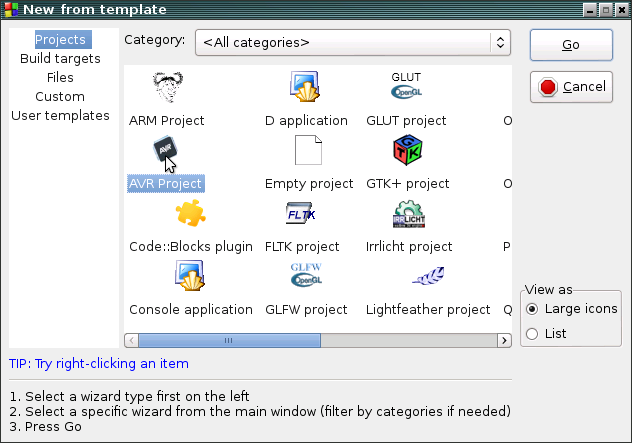
In the wizard that opens up, select AVR Project:
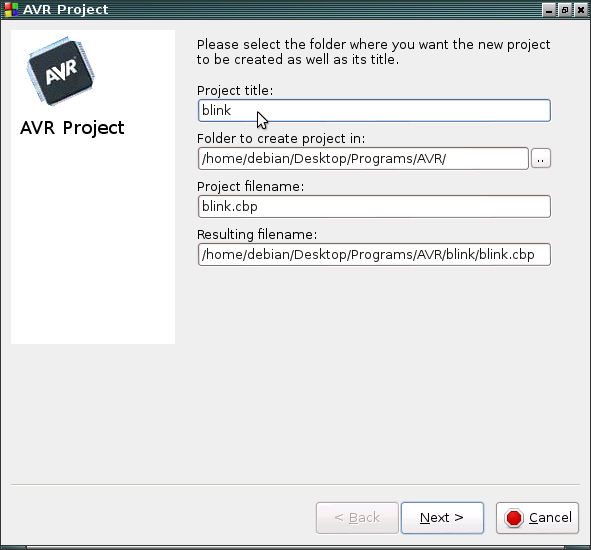
Select title and folder for the project. The filenames are auto-completed so you don’t have to worry about them. Then click “Next”.
Select debug and/or release configurations. For such a small project, we don’t need the debug configuration. Click “Next”.
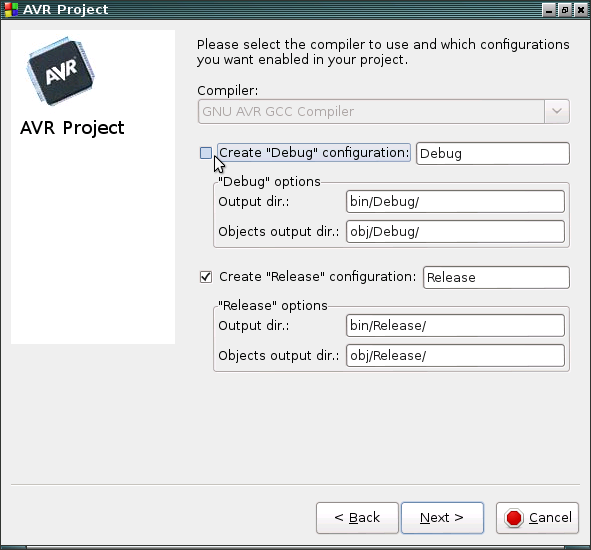
Select target hardware (i.e. microcontroller model). Make sure you also tick “Create hex files”, and for “Define F_CPU with the following value” type the appropriate value. For the ATtiny85 which we will use here, fresh from the factory and without any changes is settings, the correct value is “1000000UL” (1MHz). Click “Finish”.

Done! The project is ready. In the tree view on the left, expand “Sources” and double-click “main.c“. You’ll see the skeleton code provided for you by the IDE:
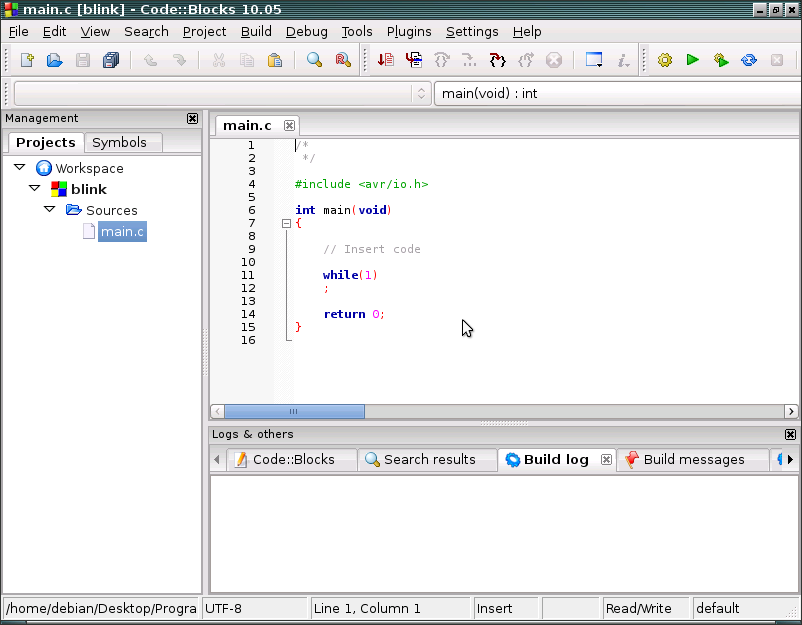
However, that’s a blank code, and I want to show you Blink code. We won’t go into the details of the code here. For the time being, just copy-paste this instead of the existing code:
#include <avr/io.h>
#include <util/delay.h>

int main(void) {

  DDRB = 1;
  while (1) {
    PORTB ^= 1;
    _delay_ms(300);
  }
  return 0;

}
Select Build->Build (or press Ctrl+F9) from the menu. If you did everything right, here’s the output you should expect:
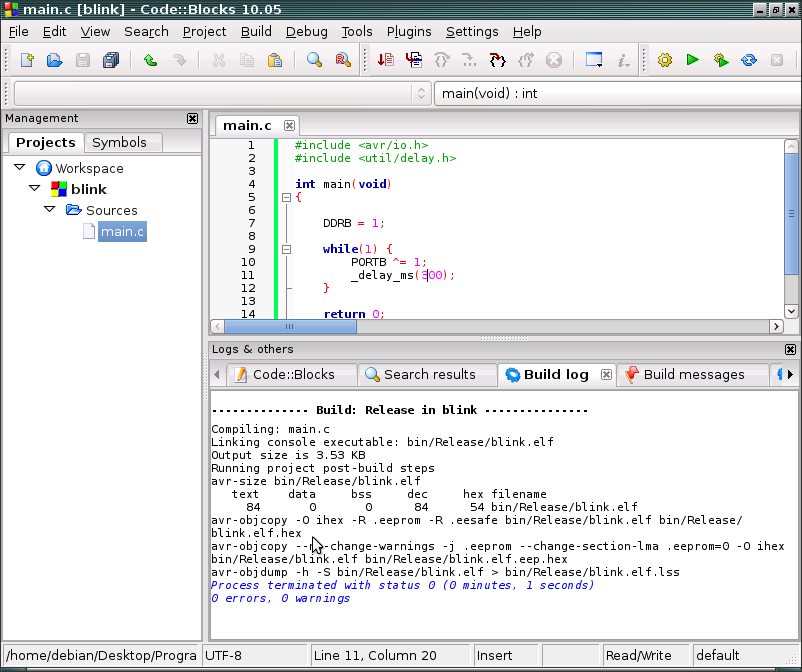
The coveted .hex file was generated and is waiting patiently in place. Time to set up the hardware.
Setting Up The Hardware
The USB ISP module connects to your computer – get this – through USB. On the other end, however, it has a funky connector that you have to study carefully. This black plastic header has a little triangle embossed on it. You may need a magnifying glass to see it, but it’s there somewhere. This triangle points directly to pin 1 of the connector:
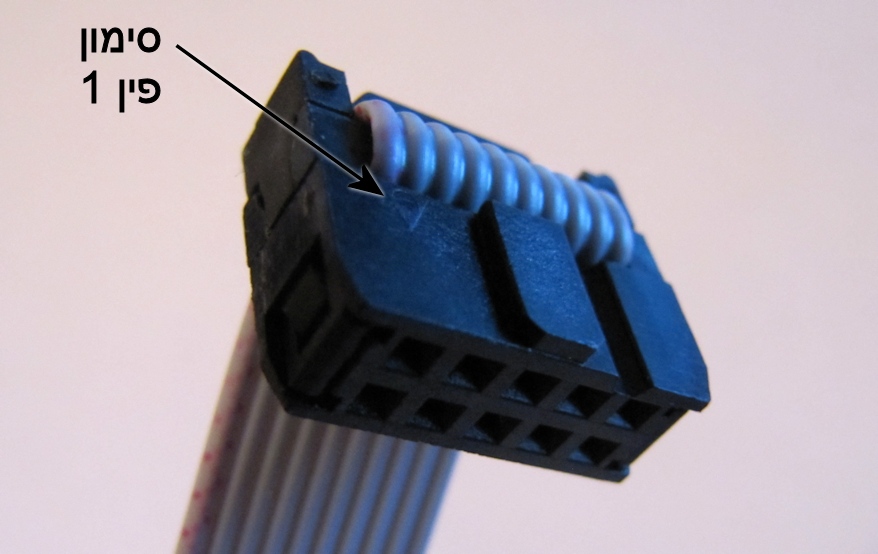
The rest of the pins go by this physical order (“A” here means 10):
13579
2468A
So, in the picture above, pin 2 is just under pin 1, pin 3 is just to the right of pin 1 etc.
From these ten pins, you need six:
Pin 1 : MOSI ("Master Out Slave In")
Pin 2 : Vcc
Pin 5 : Reset
Pin 7 : SCK (Clock)
Pin 9 : MISO ("Master In Slave Out")
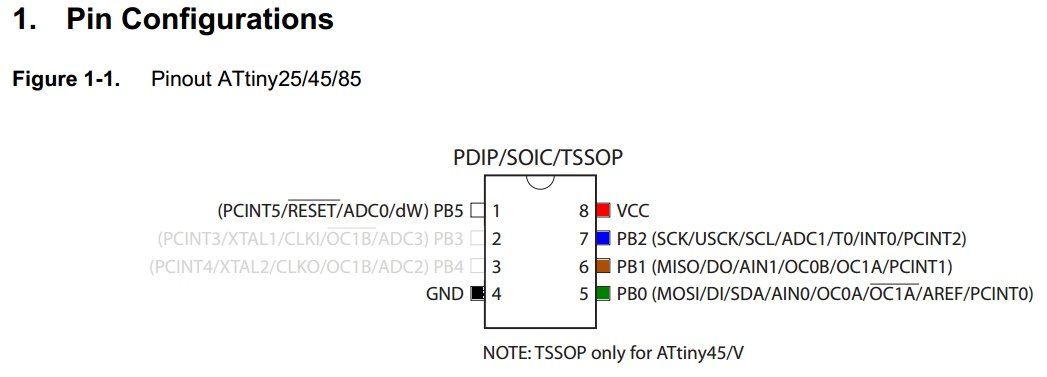
Pin 10 : GNDThese six pins you’ll have to connect to the same-name pins on the AVR microcontroller. Here’s a relevant pinout for the ATtiny85, based on the drawing in the datasheet. Look carefully, these names are really in there, hiding:
If you happen to have a 10-pin to 6-pin adapter, the relevant pin names will be printed on it (hopefully).
Remember, with USBasp, pin Vcc actually provides power to the IC, not just checks for it as in the official Atmel programmer.
Burn, Baby, Burn
We are set now for the actual burning. We will do that by, first of all, locating the generated HEX file. The name and relative path to it should appear in the Code::Blocks build output. Open a terminal window and type this:
sudo avrdude -c usbasp -p MCU_MODEL -U flash:w:HEX_FILE
Where, of course, MCU_MODEL should be the model of your MCU, for example attiny85, and HEX_FILE should be the full name (and path, if needed) of the HEX file, e.g. blink.elf.hex.
Programming this way takes relatively long time – the smallest program may require a couple of seconds. AVRDude may show some warnings, but if there are no explicit errors, the compiled code will be loaded to your AVR. Well done!
For more information on AVRDude options and their meaning, see here.
P.S. Oh yes, we burned a Blink code but there’s nothing there to actually blink… but that is another story 😉
https://www.dropbox.com/sh/0tnl95o5mjt24gf/AABelR_IyM89OHbP95-tHdDka?dl=0
Go to the link see the screen shots. I faced this problem.
I have no idea what these mean. I don’t work with Linux regularly and this post is from almost three years ago…
Thanks for This! Gud Shabbos / Shabbat Shalom!